
Using Social Reviews for Authority

Infographic titled “Using LeadsLeap Social Reviews” showing steps to create, write, and share reviews to build authority and drive affiliate traffic.

🌟 Using LeadsLeap Social Reviews to Build Authority and Trust

Want to stand out in a sea of affiliate links? Try something most marketers ignore — LeadsLeap Social Reviews.

This built-in tool helps you create public reviews of tools, services, and opportunities you’re using. In return, you gain:

  • ✅ More exposure
  • ✅ Increased trust
  • ✅ Organic traffic and LeadsLeap referrals

Here’s how to use this hidden gem to build your brand and bring in passive leads over time.


🔍 What Are LeadsLeap Social Reviews?

LeadsLeap allows members to post honest reviews of any program or service (especially ones you’re promoting). These reviews are visible:

  • 📌 On LeadsLeap’s internal review directory
  • 📢 Through search engine traffic (they rank!)
  • 🔗 Via your own links and blog embeds

Each review includes your referral link — so if someone signs up, you get the credit.


🎯 Why Social Reviews Work So Well

People trust other people more than they trust ads. That’s why reviews carry weight.

When you write a helpful, real review (not hype), you position yourself as:

  • 🧠 Someone with firsthand experience
  • 🤝 A trustworthy source of info
  • 🌱 A real user, not just a pitch machine

And LeadsLeap rewards you for it — with rankings, visibility, and potential affiliate signups.


✏️ How to Write a Good Review

Here’s a simple formula for writing social reviews that work:

  1. Introduce the product or service — what it is and who it’s for
  2. Share your personal experience — how you’ve used it and what happened
  3. List 2–3 pros (and maybe a con — be real)
  4. Include a call to action with your referral link

Pro tip: Write like you’re talking to a friend who asked, “Is this any good?”


🔗 Where to Use Your Reviews

Once your review is live, put it to work:

  • 📄 Link to it from your blog or “tools I use” page
  • 📧 Share it in your email autoresponder
  • 🗣️ Mention it in your YouTube, TikTok, or podcast content
  • 💬 Share it on forums or in relevant Facebook groups (tactfully!)

The more places you use it, the more visibility (and trust) you build.


✅ Great Review Topics to Start With

  • LeadsLeap itself
  • WarriorPlus tools you actually use
  • PLR sellers you recommend
  • Ad or traffic platforms (like your own Choice4ProfitAds)
  • Training courses, autoresponders, or domain hosts

Basically, if you use it and believe in it — review it.


💬 Final Thoughts

Social reviews help you stand out, provide value, and build long-term authority — all while earning passive traffic and affiliate income.

Write from experience. Be honest. Help others make better decisions.

That’s how you turn a review into a relationship — and a click into a customer.

👉 Join LeadsLeap and publish your first review today


Want step-by-step help building your own online business? Check out my favorite platform below.

Hidden Features Breakdown

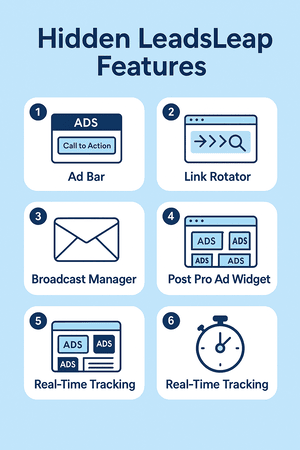
Infographic highlighting six hidden LeadsLeap features including Ad Bar, Link Rotator, Sub-ID tracking, Broadcast Manager, Post Pro Widget, and Real-Time Stats.

🕵️‍♂️ Hidden LeadsLeap Features That Most Users Miss

LeadsLeap is loaded with tools — but many users only scratch the surface.

In this guide, we’re going to pull back the curtain and show you the advanced (and often overlooked) features that can help you drive more traffic, track your links better, and run a smarter business — even if you’re using a free account.


📌 1. The Ad Bar

The Ad Bar lets you add a branded banner to any link you track. When someone clicks your LeadsLeap tracking link, they’ll see a small, non-intrusive banner at the top or bottom of the page with your message and a call to action.

Use it to promote:

  • 💬 A link to your lead magnet
  • 🛒 A second offer related to the main one
  • 📢 A custom CTA (“Need help? Join my list!”)

Enable it under the Link Manager > Ad Bar tab.


This tool allows you to rotate multiple URLs through one single tracking link. Great for split-testing offers or rotating traffic between multiple landing pages.

Perfect if you want to test:

  • Two different versions of a squeeze page
  • Different bridge pages for the same affiliate offer
  • Bonus delivery pages or redirect sequences

Use this when promoting in classified ads, solo ads, or anywhere you expect consistent clicks.


📊 3. Sub-ID Tracking

This feature is buried deep but incredibly powerful. You can append a ?r=source to the end of any LeadsLeap link to track exactly where your clicks are coming from.

Example: https://leadsleap.com/?r=fivecharlie&subid=classified1

This helps you track which platforms (safelists, email blasts, YouTube links, etc.) are actually converting.


📬 4. Broadcast Manager (Free Email Blasts)

LeadsLeap includes an autoresponder and broadcast tool you can use to send emails to your list — without monthly fees.

Inside List Manager you can:

  • Create email sequences (follow-ups)
  • Send broadcast emails manually
  • View open/click stats per message

Perfect for promoting affiliate products, blog posts, or your WA review funnel.


📲 5. Post Pro Ad Widget (Bonus Feature)

If you run a blog or WordPress site, you can embed your LeadsLeap ads and monetize your content directly.

This feature allows you to display rotating ads from the LeadsLeap network — and earn ad views and commissions passively.

Find it under Money > PPC Widget.


⏱️ 6. Real-Time Click Tracking Dashboard

Click “Stats” inside the Link Manager and you’ll see detailed real-time analytics:

  • Time of click
  • Device used
  • Location (country, browser, etc.)

This helps you analyze your campaigns in depth — which is almost unheard of in free tools.


✅ Final Thoughts

Most people use LeadsLeap just for traffic. But the hidden tools inside it are what truly make it powerful.

With just a little effort, you can start using:

  • 🔗 Link rotators
  • 🧭 Real tracking with sub-IDs
  • 📬 Email marketing & autoresponders
  • 🧱 Page building + popups

It’s not about using everything — it’s about using the right tools for your goals.

👉 Explore the full LeadsLeap toolbox here and give yourself an edge.


Want step-by-step help building your own online business? Check out my favorite platform below.

Popup Creator Guide

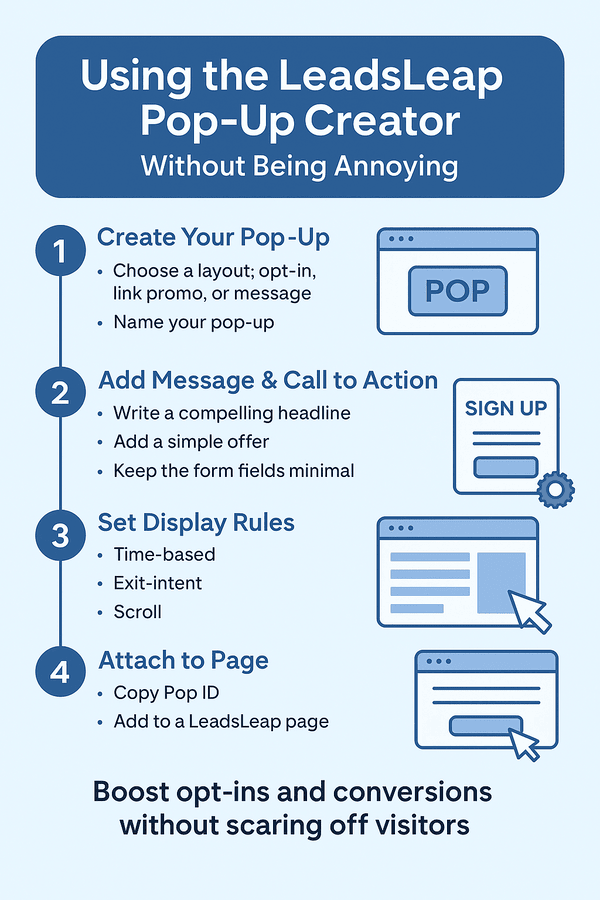
Infographic titled “Using the LeadsLeap Pop-Up Creator” with four visual steps covering setup, message writing, display settings, and page integration.

💡 LeadsLeap Pop-Up Creator Guide: Boost Conversions Without Being Annoying

Let’s be honest — most popups suck. They interrupt the visitor, load too late, or feel like spam.

But if used correctly, popups can be one of the highest-converting tools in your marketing toolbox — especially if you’re using LeadsLeap’s Pop Manager.

In this guide, you’ll learn how to use popups the right way — with less push, more pull, and smarter timing.


🔍 What Is the LeadsLeap Pop Manager?

LeadsLeap’s Pop Manager lets you create simple but powerful popups that can:

  • ✅ Collect email addresses
  • ✅ Promote affiliate links or offers
  • ✅ Direct users to your landing pages

You can set them to trigger based on time, user exit intent, or scroll behavior. And yes — it works even if you’re using the free version of LeadsLeap.


🧱 Step 1: Create Your Popup

  1. Log in to LeadsLeap
  2. Go to Pop Manager
  3. Click “Add New Pop”

Choose your layout style (opt-in, link promo, or message-only) and give it a name.


✏️ Step 2: Add Your Message & Call to Action

Edit the popup content just like you would a mini landing page. Include:

  • A quick, compelling headline (value-focused)
  • A short message or benefit
  • A button or form — keep it simple

💡 Example: “Want 100 Free Ad Credits? Grab This Guide Instantly.”


🎯 Step 3: Set Your Display Rules

This is where you choose when and how the popup appears:

  • 🕒 Time-based (e.g., show after 10 seconds)
  • 📤 Exit intent (trigger when they’re about to leave)
  • 📜 Scroll percentage (show after 50% scroll)

You can also limit how often it shows per user (once per session, once per day, etc.). This is key for not annoying your visitors.


🚀 Step 4: Attach to Any LeadsLeap Page

Once you’ve built your popup, just grab the Pop ID and attach it to any page inside your Page Manager.

  1. Edit the page
  2. Find the “Use a Pop” option in settings
  3. Select your popup from the dropdown

That’s it — your popup is live and working automatically.


✅ Best Practices for Non-Annoying Popups

  • 📌 Only use popups on focused pages (like a blog post or thank-you page)
  • 📩 Offer something valuable — not just “Sign Up Now”
  • 🧠 Use scroll-based or exit-intent triggers to avoid disruption
  • 📱 Check mobile view — popups should be easy to close

Used wisely, popups don’t have to be annoying — they can be a smooth next step in your funnel.


💬 Final Thoughts

Popups still work — when they’re used right. And LeadsLeap gives you a free, flexible way to add them to your marketing funnel without code or complexity.

Use popups with intention, offer something valuable, and let them gently guide your visitors where you want them to go.

👉 Try the LeadsLeap Pop Manager here and test your first popup today.


Want step-by-step help building your own online business? Check out my favorite platform below.

Page Builder for Beginners

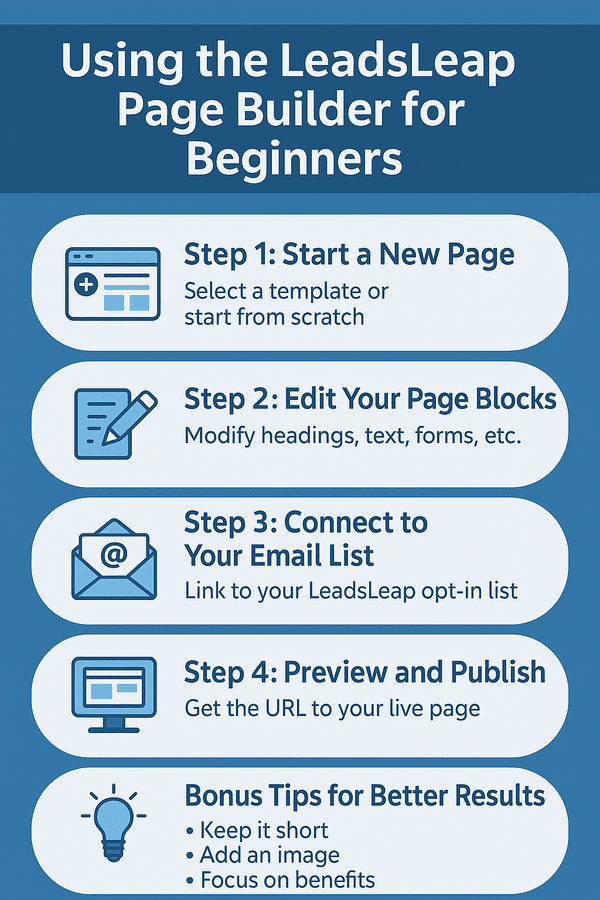
Infographic titled “Using the LeadsLeap Page Builder for Beginners” with five steps including page creation, editing, list connection, publishing, and optimization tips.

📄 LeadsLeap Page Builder for Beginners: Simple Setup, Big Results

If you’ve ever said “I’m not techy enough to build a page,” you’re not alone.

The LeadsLeap Page Builder is made for people just like you — beginners who want to create landing pages, bridge pages, or even full mini-sites without code, expensive tools, or confusion.

Here’s how to use it — step-by-step — even if you’ve never built a page before.


💡 Why Use the LeadsLeap Page Builder?

There are lots of page builders out there, but LeadsLeap stands out because:

  • ✅ It’s 100% free (even the good stuff)
  • ✅ No need for external hosting or plugins
  • ✅ Easy drag-and-drop system — no coding
  • ✅ Works great for affiliate marketers

You can build opt-in pages, thank-you pages, bridge pages, or even bonus delivery pages — all in the same system you’re using for traffic and tracking.


🧱 Step 1: Start a New Page

Once you’re logged into LeadsLeap, go to:

  1. Tools > Page Manager
  2. Click “Add a New Page”
  3. Select a template or start from scratch (use a template to make life easier)

Tip: Don’t worry about making it perfect — your goal is to publish something usable, not win design awards.


✏️ Step 2: Edit Your Page Blocks

You’ll see sections like:

  • Headline – Write something attention-grabbing with a benefit
  • Subheadline – Clarify the offer (e.g. “Free Guide Reveals…”)
  • Opt-in Form – Collect names/emails directly into LeadsLeap
  • Image or video block – Optional, but great for engagement

Click on each block to edit text, fonts, and layout. It autosaves as you go.


📬 Step 3: Connect to Your Email List

If you’re using LeadsLeap’s built-in email system:

  1. Go to List Manager
  2. Create a new list and copy the form ID
  3. Paste it into your page’s opt-in settings

This connects your page to your follow-up emails. No third-party service required!


🚀 Step 4: Preview and Publish

Click “Preview” to check how your page looks on desktop and mobile.

When you’re happy, click “Get Page URL” — this is the live link you’ll promote on:


🔧 Bonus Tips for Better Results

  • 📌 Keep it short — one goal per page
  • 📸 Use a clear image or icon above the opt-in
  • 🎯 Focus the copy on the benefit to the reader
  • 📊 Track your results with LeadsLeap’s link tracker

Want a real-world example? Use your page to promote a free PDF, redirect to a WarriorPlus product, or build your affiliate list — all within LeadsLeap.


✅ Final Thoughts

Building a page used to require designers, developers, and monthly fees. Not anymore.

With LeadsLeap, you can create professional-looking pages — for free — even if you’ve never done it before.

It’s beginner-friendly, mobile-ready, and built with marketers in mind. Once you get the hang of it, you’ll wonder why you ever hesitated.

👉 Join LeadsLeap and build your first page today


Want step-by-step help building your own online business? Check out my favorite platform below.
Driving High-Converting Traffic

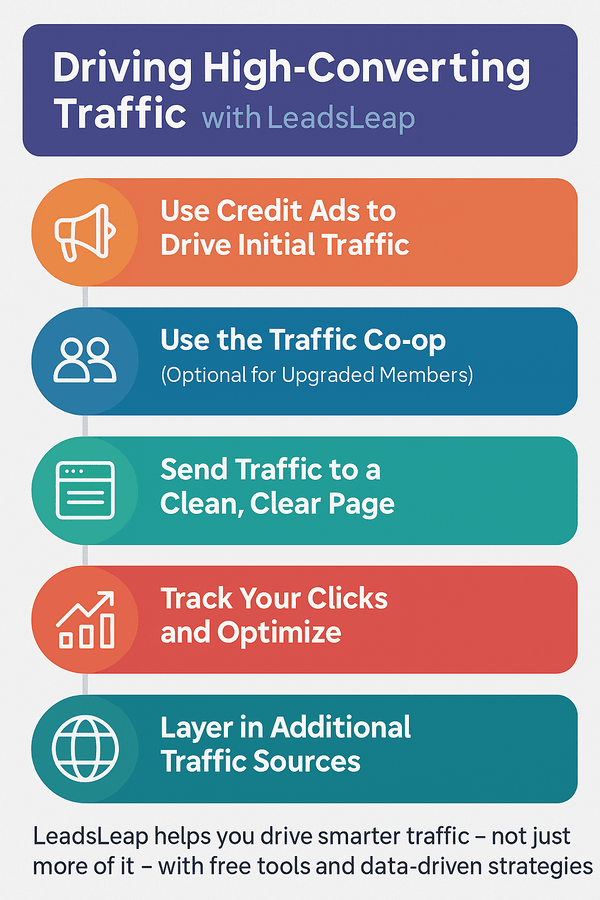
Infographic listing five steps for driving high-converting traffic using LeadsLeap, including credit ads, co-op traffic, tracking, and optimization.

🚦 Driving High-Converting Traffic with LeadsLeap

If you’ve been posting links everywhere and getting zero conversions, don’t worry — it’s not just you.

Traffic is easy to get. Quality traffic that actually converts? That takes a smarter system — and that’s exactly what LeadsLeap helps you build.

Here’s how to use it to get better traffic, more targeted clicks, and higher conversion rates — even as a free member.


📢 Step 1: Use Credit Ads to Drive Initial Traffic

LeadsLeap’s traffic exchange lets you earn credits by viewing other members’ ads. You can use those credits to promote your own:

  • Landing pages
  • Bridge pages
  • Affiliate offers

Set up multiple ads and rotate them. LeadsLeap gives you real-time stats on views, clicks, and click-through rates.

Pro tip: Lead with curiosity or value — not hype. You want real people to click, not just “ad skimmers.”


👥 Step 2: Use the Traffic Co-op (Optional for Upgraded Members)

Upgraded members can pool ads together and run them through LeadsLeap’s traffic co-op — which pulls visitors from outside platforms.

That means more fresh eyeballs, higher click rates, and better quality leads. If you’re serious about scaling, the co-op is a no-brainer upgrade.


🧱 Step 3: Send Traffic to a Clean, Clear Page

Your traffic is only as good as the page it lands on.

Use LeadsLeap’s page builder to create:

  • Clear headlines with a specific benefit
  • Simple opt-in forms — no distractions
  • One CTA per page (don’t confuse your traffic!)

Test your pages regularly. Just changing a headline can double your opt-ins.


📊 Step 4: Track Your Clicks and Optimize

With LeadsLeap’s tracker, you can see:

  • Which ads get the most clicks
  • Which pages convert best
  • Where your traffic is really coming from

Once you have data, adjust your ads and headlines accordingly. Cut what’s not working — double down on what is.


🌐 Step 5: Layer In Additional Traffic Sources

Once you’ve fine-tuned your offer using LeadsLeap traffic, start sharing your landing page across other platforms like:

LeadsLeap becomes your conversion-optimized base — and you feed traffic into it from multiple streams.


✅ Final Thoughts

You don’t need thousands of random visitors. You need 100 targeted clicks that actually care.

LeadsLeap gives you everything you need to create, track, and scale high-converting traffic — without paying for solo ads, expensive funnels, or ad agencies.

Start free. Test smart. Scale slowly. That’s the formula for traffic that converts.

👉 Join LeadsLeap here and start driving better traffic

Budget-Friendly Email List Building

Infographic illustrating 5 steps to build an email list on a tight budget using LeadsLeap’s free tools and traffic systems.

💌 Budget-Friendly Email List Building with LeadsLeap

You’ve probably heard it a thousand times: “The money is in the list.” But what if you’re starting with zero budget?

That’s where LeadsLeap comes in — a 100% free platform that gives you everything you need to build an email list without spending a dime.

Here’s how to make it happen — step by step.


🎁 Step 1: Create a Simple Lead Magnet

Before you can build a list, you need something to offer. This can be:

  • A free report or checklist (use PLR content or AI to create one)
  • Access to a free video, tool, or resource
  • “Behind the scenes” info or bonus content for affiliates

Keep it simple — the goal is to give value in exchange for an email address.


📄 Step 2: Build a Capture Page with LeadsLeap

LeadsLeap includes a drag-and-drop page builder that’s perfect for beginners.

Use it to create a clean, mobile-friendly squeeze page. Include:

  • A clear headline with the benefit
  • A short description or bullet list
  • A form that collects the visitor’s email

Pro tip: LeadsLeap even hosts your pages — no need for separate hosting or domains.


📬 Step 3: Set Up Your Email Follow-Up

LeadsLeap offers a built-in email autoresponder you can use for:

  • Automated welcome emails
  • Ongoing value-based follow-ups
  • Affiliate offers and content promotions

You don’t need a third-party tool like GetResponse or AWeber — it’s all built in.


🚀 Step 4: Get Free Traffic to Your Page

LeadsLeap also includes a free ad system and traffic exchange. Here’s how to start:

  • Use Credit Ads to get eyeballs on your squeeze page
  • Surf ads to earn credits — these convert into views for your offer
  • Upgrade when you’re ready, but start free

Want more reach? Promote your page on classified sites like:


📊 Step 5: Track, Tweak, and Improve

Use LeadsLeap’s tracker to measure:

  • Clicks per source
  • Conversion rates on your opt-in page
  • Follow-up email open/click stats

Over time, you’ll see what works — and you’ll build a list that grows even while you sleep.


✅ Why This Works

Most beginners burn out trying to build a list because they’re told they need:

  • Expensive autoresponders
  • Monthly funnel tools
  • Paid ads or complicated platforms

LeadsLeap removes all of that. It’s simple, free, and effective. And it works because it lets you focus on building your audience, not your overhead.


💡 Final Thoughts

You don’t need a big budget to start growing your list.

With LeadsLeap, you can launch your first list-building funnel today — complete with a page, autoresponder, traffic source, and tracking system… all for free.

Start building your email list the smart, budget-friendly way — and set yourself up for long-term success.

What is LeadsLeap?

Infographic introducing LeadsLeap as a free, all-in-one marketing platform with traffic, tools, and earning potential for affiliate marketers.

🧰 What Is LeadsLeap and Why Every Beginner Marketer Should Be Using It

If you’re looking for an all-in-one marketing platform that helps you get traffic, build your list, promote affiliate offers, and automate your business — without spending a dime — LeadsLeap is the answer.

In this guide, we’ll break down exactly what LeadsLeap is, what it does, and why it’s one of the smartest tools online marketers (especially beginners) can use in 2025 and beyond.


📌 LeadsLeap Overview

LeadsLeap is a free traffic and marketing platform that’s been online since 2008. It’s built to help online business owners generate leads, promote offers, and build sustainable income using a suite of integrated tools — all under one roof.

It includes:

  • ✅ A traffic exchange and ad network
  • ✅ A landing page builder (no tech skills needed)
  • ✅ A built-in email autoresponder
  • ✅ Link tracking and rotators
  • ✅ Affiliate tools and earning potential

👤 Who Is LeadsLeap For?

LeadsLeap is ideal for:

  • 📬 Affiliate marketers promoting digital offers
  • 🚀 Beginners with no budget who want free traffic
  • 📈 List builders who want to automate email follow-ups
  • 🧪 Testers and trackers who want real-time click data
  • 💰 Anyone building funnels or offers on a shoestring

Whether you’re promoting WarriorPlus products, ClickBank offers, your own funnel, or even just building a list — LeadsLeap gives you the tools to do it without paying for expensive software.


🛠️ Key Features of LeadsLeap

🌐 1. Free Traffic Exchange

You can surf ads to earn credits and get your own ads shown to other users. Even as a free member, you can generate steady daily traffic.

📄 2. Drag-and-Drop Page Builder

Create squeeze pages, thank-you pages, or full mini-sites with no coding. Perfect for affiliate marketing or building your list.

📬 3. Free Email Marketing System

Track your clicks, test multiple offers, and see what’s converting. A must-have for any marketer.

💸 5. Earn While You Build

LeadsLeap offers multiple income streams, including:

  • Referral commissions (even on free members)
  • 10-level deep recurring income
  • Traffic co-op sharing and upgrades

🚀 How to Get Started

It’s 100% free to join. Just create an account and start using the tools — no credit card required.

👉 Join LeadsLeap here and unlock the traffic, tracking, and tools you need to start building your online income the smart way.


📚 What’s Next?

This article is part of a complete series on how to use LeadsLeap effectively. Be sure to check out these next:


✅ Final Thoughts

LeadsLeap is one of the few platforms that truly delivers value to beginners and pros alike — with no hype, no gimmicks, and no up-front cost.

Whether you want traffic, tools, or long-term income, it’s all here.

Get started today — and start building smarter.

👉 Click here to join LeadsLeap free

Final Tips for Long-Term Classified Ad Success

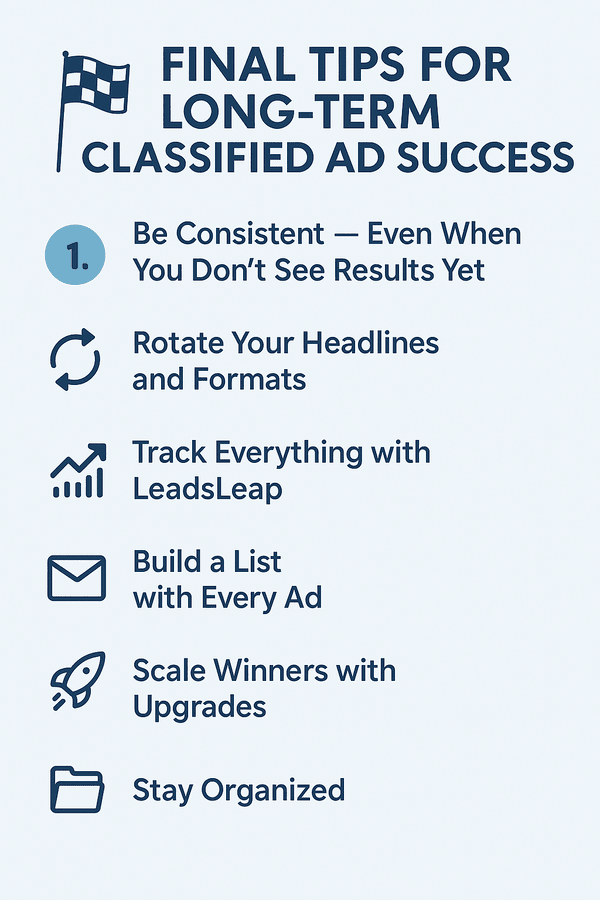
A clean infographic listing six final tips for long-term success with classified ads, including consistency, tracking, and scaling winners.

🏁 Final Tips for Long-Term Classified Ad Success

Posting a few ads and hoping for instant results? That’s a recipe for frustration.

The real power of classified ads comes from staying consistent, tracking your results, and refining your strategy over time. Here are the final tips that separate dabblers from marketers who actually make classified ads work.


📆 1. Be Consistent — Even When You Don’t See Results Yet

It might take 10, 20, or even 30+ ads before you start to see real traction. That’s normal. Don’t give up after one or two posts.

Set a schedule — post 1–3 ads a day, every day for a month. You’ll be amazed what compounds with time.


🔄 2. Rotate Your Headlines and Formats

Don’t just copy-paste the same ad. Try different angles, benefits, or emotional hooks in your headlines. This helps you avoid filters, reach different audiences, and discover what truly pulls clicks.

Bonus: Save your best-performing variations for future upgrades.


📊 3. Track Everything with LeadsLeap

Use LeadsLeap to monitor which ads and sites are delivering results. You can track:

  • Clicks per ad
  • Clicks per site
  • Conversion to opt-in or sale

Once you know what’s working — do more of it. Once you know what isn’t — cut it.


📬 4. Build a List with Every Ad

Every ad should send traffic to a squeeze page or bridge page — not directly to an affiliate link.

This way, even if they don’t buy right away, you can follow up with them via email (using the built-in tools in LeadsLeap if you want to keep it free).


🚀 5. Scale Winners with Upgrades

Once you’ve posted a few dozen ads and tracked what’s working, don’t be afraid to upgrade your best performers. Sites like:

…let you boost your visibility with top-of-page placement, bold formatting, or featured listings — often for just a few bucks. If it already works, upgrading can double the results.


🗂️ 6. Stay Organized

Create a simple spreadsheet to track:

  • Where you posted
  • What the ad said
  • When it went live
  • How many clicks it got

This helps you avoid repeating ads too often and gives you a clear picture of what’s performing best.


✅ Final Thoughts

Classified ads are still one of the most underrated free and low-cost traffic methods online — but like anything else, success takes consistency, testing, and a long-term mindset.

Post daily. Track your links. Focus on building a list. Scale your winners. And let your older ads keep working for you while you grow.

Do that, and your ad strategy won’t just work… it’ll multiply.

Results You Can Expect from Ad Sites

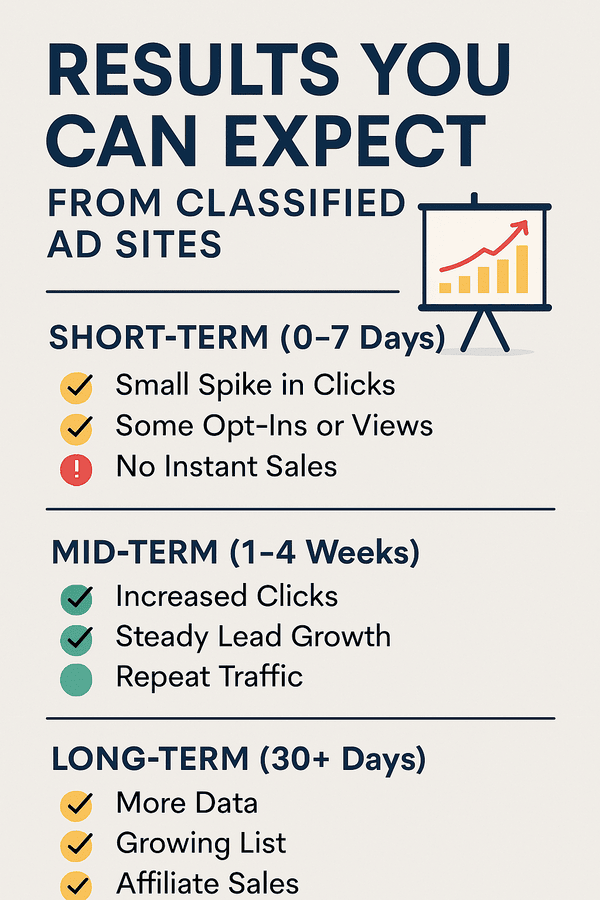
Infographic showing short-term, mid-term, and long-term results from classified ad sites, with icons and milestones over time.

📈 Results You Can Expect from Classified Ad Sites

Classified ad sites are a low-cost way to generate traffic — but what kind of results can you *actually* expect?

Let’s break down what’s realistic, what’s not, and how to maximize your time and effort with these platforms.


🕒 Short-Term Results (0–7 Days)

When you post your first ad, here’s what you might see in the first few days:

  • ✅ A small spike in clicks — especially if you post on high-traffic sites
  • ✅ Some opt-ins or page views, depending on your offer
  • ⚠️ No instant sales — that’s normal unless you’re promoting a super-targeted offer

Pro tip: Track your links using LeadsLeap to see which ads are getting attention.


📆 Mid-Term Results (1–4 Weeks)

If you’re consistent with your posting and testing, you’ll likely see:

  • 📊 Increased clicks from older ads still getting views
  • 📥 Steady opt-ins or lead growth
  • 🔄 The beginning of repeat traffic from certain ad sites

This is when your efforts start compounding. The more ads you’ve got posted and working, the more passive clicks you get daily.


📅 Long-Term Results (30+ Days)

After a month of consistent posting, here’s what becomes possible:

  • 💡 Data on what headlines and sites work best
  • 📬 A growing email list you can promote to again and again
  • 💸 Potential affiliate commissions as trust builds with leads
  • 🔁 Evergreen traffic from older ads that are still live

Some ad platforms let your posts stay active for 30, 60, or even 90+ days — meaning your efforts today keep working weeks from now.


⚖️ What’s Realistic?

Classified ad sites won’t make you rich overnight. But they’re **perfect for:

  • 🧪 Testing headlines, links, and angles
  • 💰 Driving traffic to squeeze pages and lead magnets
  • 🚀 Building a base of consistent, targeted clicks

The key is repetition. One ad won’t move the needle — but 30+ good ads posted over time? That’s how you create momentum.


✅ Final Thoughts

If you’re expecting instant riches, classified ads aren’t it. But if you’re looking for **consistent, scalable traffic on a budget**, they deliver — especially when combined with solid tracking, good offers, and smart copy.

Start small, stay consistent, and let your ads work for you over time.

📊 Want help tracking and improving results? Try LeadsLeap for free link tracking, pages, and email follow-ups.

Posting Dos and Don’ts

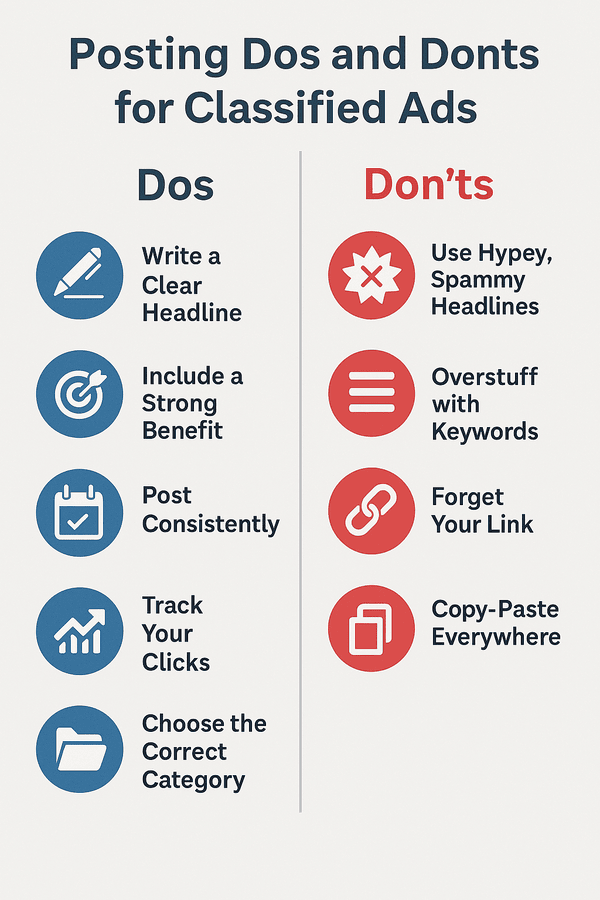
Infographic comparing posting dos and don'ts for classified ads, including tips for strong headlines, clear value, and avoiding spammy tactics.

📋 Posting Dos and Don’ts for Classified Ads

Posting classified ads seems simple… until you realize your ads are getting zero clicks. The good news? A few small changes can make a big difference.

This guide covers the key dos and don’ts of posting classified ads — so you can stop wasting time and start getting results.


✅ The Dos

✍️ Do Write a Clear, Specific Headline

Your headline is everything. Make sure it tells the reader what they’re getting — fast.

Example: “Free Training: How to Start Earning Online with No Budget” beats “Make Money Fast!”

🎯 Do Include a Strong Benefit

Tell the reader why they should care. Highlight the main benefit they’ll get when they click your link.

📆 Do Post Consistently

Consistency = exposure. Aim to post daily or at least 3x a week. The more consistent you are, the more traffic you’ll build over time.

📊 Do Track Your Links

Use LeadsLeap to track ad clicks and test which headlines or platforms work best. Don’t fly blind.

🗂️ Do Choose the Correct Category

Posting in the wrong section is one of the biggest reasons ads get ignored. Always use the category that fits your offer (like “Work From Home” or “Business Opportunities”).


🚫 The Don’ts

❌ Don’t Use Hypey, Spammy Headlines

“Make $5,000 TODAY!!!” might get attention… but it kills trust. People scroll right past it. Keep it real.

🧱 Don’t Overstuff with Keywords

“Work from home, work from home, affiliate, money online, make money…” is not helping you. Google might see it as spam, and people will too.

Always double-check that your link works — and that it leads to a clean landing page, not a raw affiliate link. Use branded redirect links or page builders like LeadsLeap for a better impression.

📋 Don’t Just Copy-Paste the Same Ad Everywhere

Duplicate content = lower visibility. Rewrite your headline or opening line slightly for each site. It helps avoid filters and keeps things fresh.


🌍 Recommended Sites to Practice These Tips


✅ Final Thoughts

Posting classified ads is easy… but doing it well is a skill. The good news? It doesn’t take much to stand out. Just follow these simple dos and don’ts, and your results will improve dramatically.

Write clearly. Offer value. Post regularly. And track everything. That’s how you win with classifieds.